


The warm weather is here to stay, and let’s admit it, it takes awhile to get acclimated. Presently, I can’t go out of the house without first making sure I am sweat-proof (extra deodorant, fabrics that won’t show any hint of perspiration etc.). One major step I’ve had to take is to keep my bangs off my forehead, and if you’ve gone through at least one summer here in Arizona then you understand why. Usually this comes in the form of a topknot with at least a dozen bobby pins to keep the bangs back.
In the effort to be a bit more versatile with my hair looks this year, I searched for a few more ways to keep those bangs out of your face without looking silly.
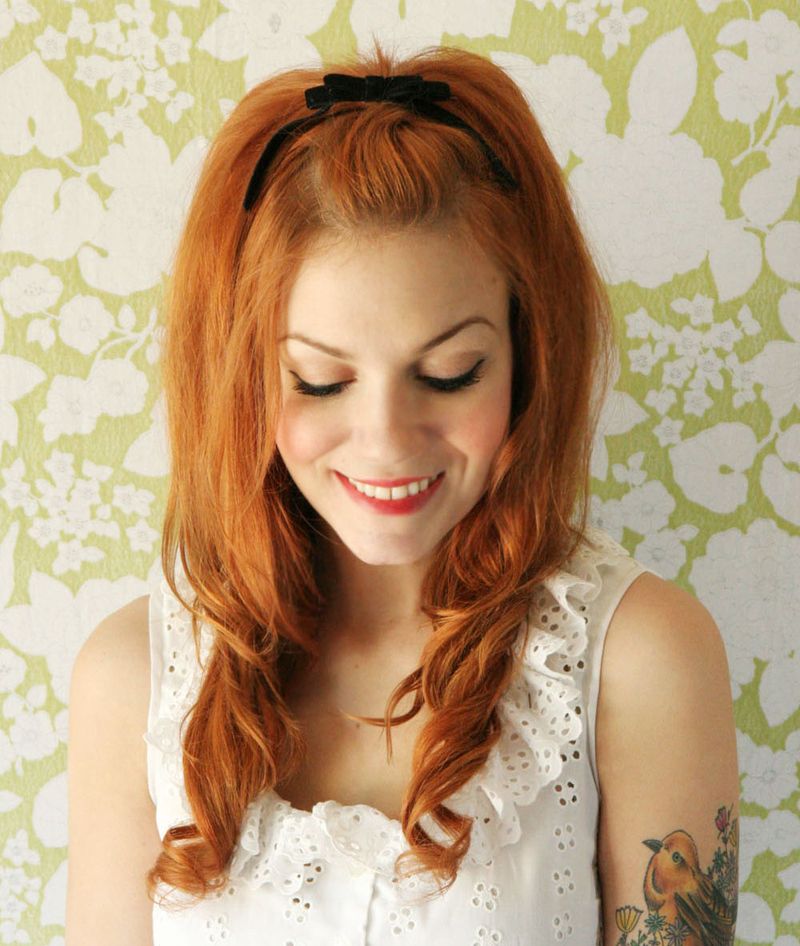
Katie from Skunkboy Blog shows us an adorable way to use a bow to keep that fringe in place on the A Beautiful Mess blog:
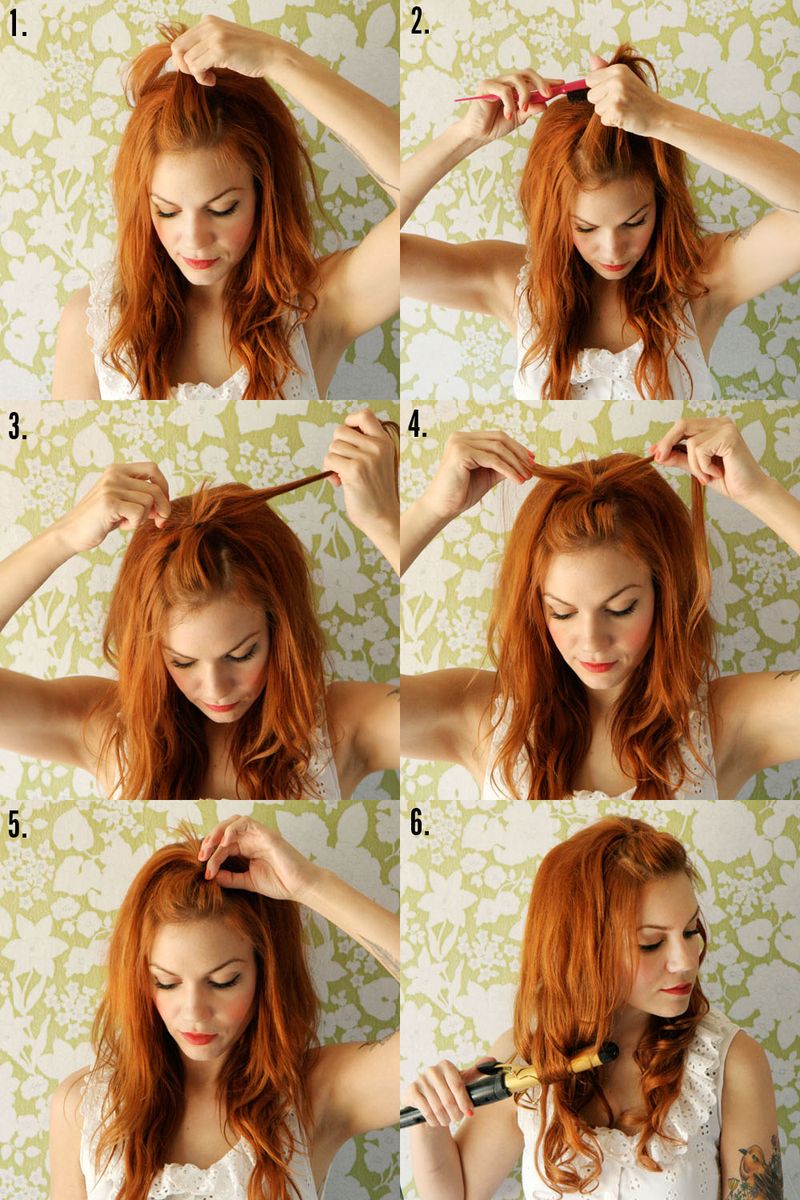
1. Gather a section of hair in the front. 2. Begin back-combing or teasing from behind. This can give your hair more volume but also help keep loose strands in place. 3. Once the section is teased, wrap a small pony tail holder around the hair. 4. Divide into two sections and pull tight. 5. Gently pull or tug at the front of the hair to create more volume and a smooth “bump.” 6. Curl the ends of hair towards the face to finish the look.
Katie suggests: Brushing through the curls to give them a smoother/wavier look. Hair spray will help keep this look in place throughout the day. Sweeten this look by adding a small bow or vintage hair clip. xo. elsie and emma
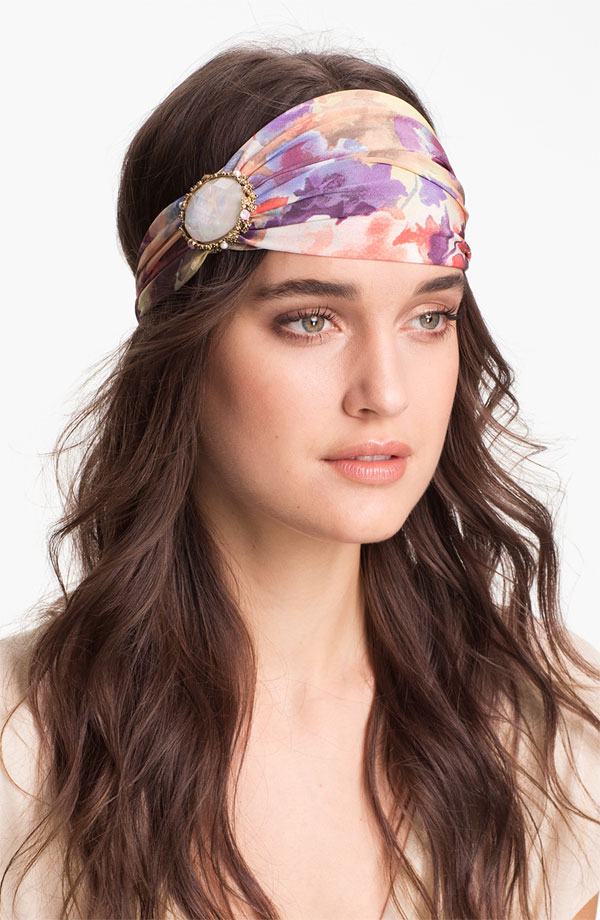
At Nordstrom
A head wrap may not seem the coolest idea (in the literal sense), but if you aren’t willing to sport it during the hottest part of the day it is worth it to give it a go for an evening out. Just style your bangs (to the side, down the middle, brushed back) and then place the headwrap over them and you are set!
If you are an expert braider or have the time to practice then this braid how-to brought to you by Lauren Conrad herself on TBD:
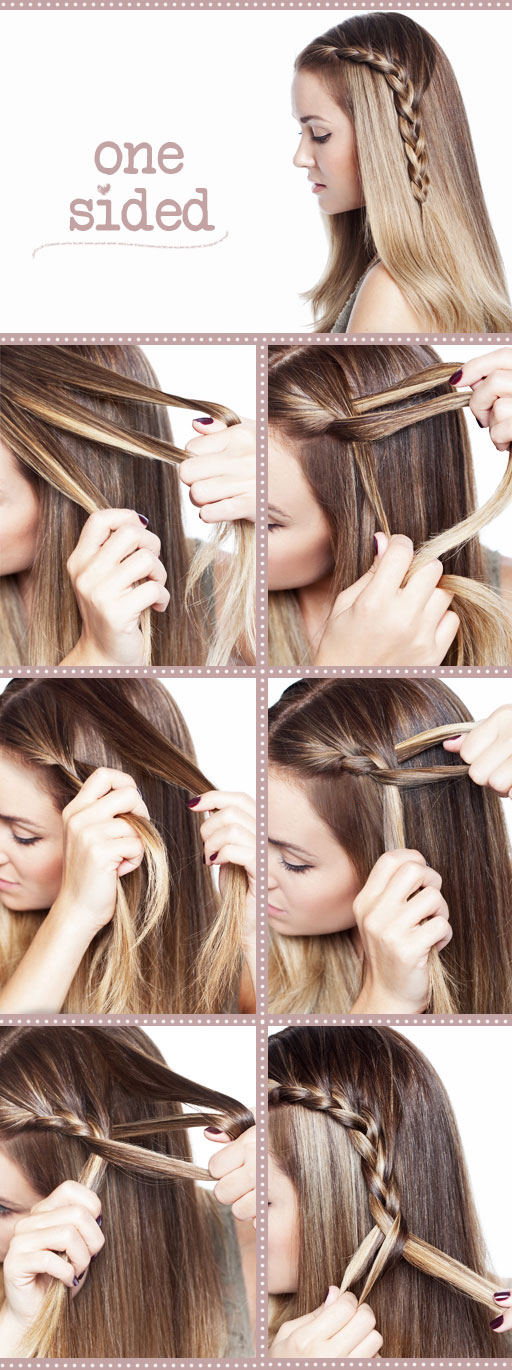
•we like to part slightly off-center for this. on the heavier side, grab a section at your hairline. split it into three.
•start it just like you would a regular french braid.
•next add in a piece of hair from the top, still like a regular french braid.
•now skip the part where you’d grab a new piece from the bottom + keep braiding instead.
•then take another piece from the top + add it in.
•continue with this pattern until you have 5-7 sections added in.
•once you’re just past the ear, stop adding in new hair. Just do a regular braid + tie it off with a clear elastic like Lauren’s in the top picture.
By Kristianne Young


