Tired of your usual PAAS Easter eggs? This year, take those hard-boiled snacks and turn them into an editable decoration sure to please everyone. Here are eight new ways to beautify your eggs, according to the craft queen, Martha Stewart.
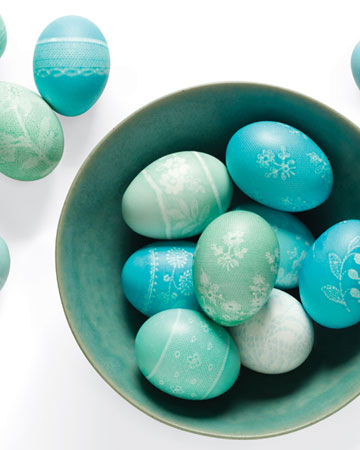
Lace Eggs
This Easter, give your eggs an elegant touch by using lace patterns while dying them.
Materials:
Eggs
Egg dye
Rubber bands
Lace trimmings
Scissors
Foam board with flathead pins
How-To:
- Cut the lace into strips that wrap around eggs and have extra to use as a sash to hold.
- Wrap the eggs and secure the lace with rubber bands.
- Follow the dye package instructions to dye the eggs.
- Once dyed, cut off the rubber bands and unwrap the lace.
- Dry on foam board.
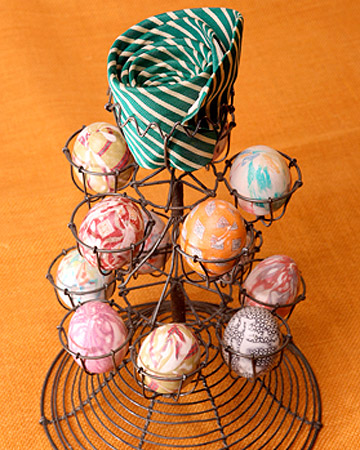
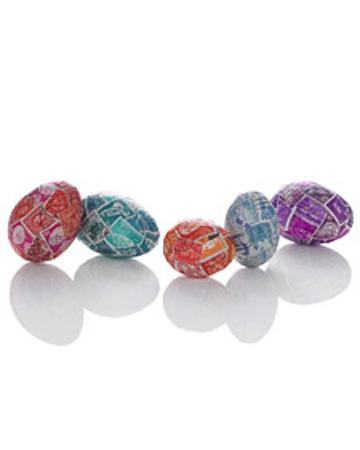
Silk Tie Easter Eggs
Looking for another use for that old silk tie or blouse? How about Easter eggs?
Materials:
Small- to medium-size raw eggs
Glass or enamel pot
Silk ties, blouses or boxers, cut into pieces that cover an egg
White sheets cut into pieces
Twist ties
3 tablespoons white vinegar
Warm water
Vegetable oil
Paper towels
Tongs or spoon
How-To:
- Wrap raw egg with piece of silk, print-side facing the egg.
- Place the egg in a piece of white sheet and secure with twist-tie.
- Place eggs in an enamel or glass pot and fill with water to cover eggs. Add three tablespoons of white vinegar.
- Bring water to a boil, turn down, and simmer for 20 minutes (longer if you plan on eating the eggs).
- Remove eggs from water using tongs or a spoon and let cool.
- Remove white sheet and silk.
- Wipe with vegetable oil to shine the eggs.
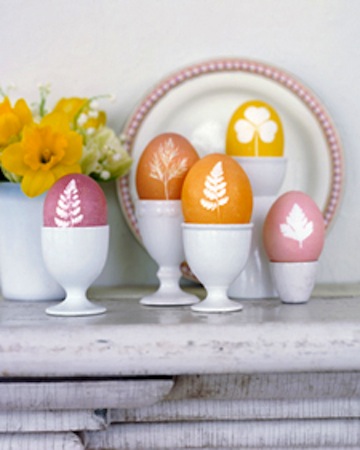
Botanical Eggs
Show your green side by adorning your eggs with pictures of trees and leaves.
Materials:
Eggs
Egg blower
Small paintbrush
Leaves or herb sprigs
Tweezers
Nylon stocking
String
Liquid food coloring
White vinegar
Bowls
Spoon
Paper towels
How-To:
- Make a pinhole in each end of a raw egg breaking the yolk. Use an egg blower or blow on one end with your mouth to expel the contents into a bowl. Rinse well with water and let dry.
- Use a small paintbrush to apply egg whites to the back of a leaf or sprig and use tweezers to center it on the egg and press down.
- Cut a nylon stocking into 5-inch tubes and stretch one side of the tube over the egg to keep the leaf in place. Tie with a string.
- Mix 1/2 cup water with 2 tablespoons vinegar and 1 teaspoon food coloring. Hold the string and immerse the egg in the mixture letting it sit for five minutes, periodically turning it.
- Remove the egg and blot dry with paper towels. Cut the string, take the egg out of the nylon and remove the leaf. Blot with paper towel again and place egg leaf side up on paper towels to dry.
Stamped Eggs
With postage constantly rising your price, you wasted a bunch of money on stamps that can’t be used, right? Wrong--use those “cheap” stamps to decorate your Easter eggs.
Materials:
Blown-out eggs
Stamps
Warm water
Glue sealant (Mod Podge)
How-To
- Soak stamps in warm water for 15-20 minutes, then peel away.
- Dry stamps facedown.
- Coat a blown-out eggshell with a water-based glue sealant.
- Position stamps to overlap.
- Paint a thin layer of glue over entire egg.
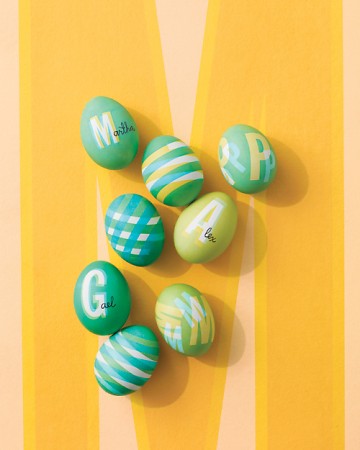
Scrambled Lines and Letters Eggs
Taken from a printing press, these eggs will make any journalist and writer giddy about Easter.
Materials:
1/4-inch-wide electrical tape
Food coloring
Paper towel
White vinegar
Vinyl letters (C-Thru, from duall.com)
How-To:
- For lines, wrap a 1/4-inch-wide electrical tape around an egg. For alphabet eggs, apply adhesive vinyl letters.
- Make your dye using one teaspoon of white vinegar and five to 20 drops of food coloring to one cup of hot water. Stir the dye regularly to keep the color even. Submerge the egg until the desired color is reached then dry with a paper towel.
- Peel off the tape and apply a second piece of tape, the same size, wrapping it in the opposite direction.
- Submerge egg in a different color dye until the desired color is reached. Dry the egg.
- Peel of the tape.
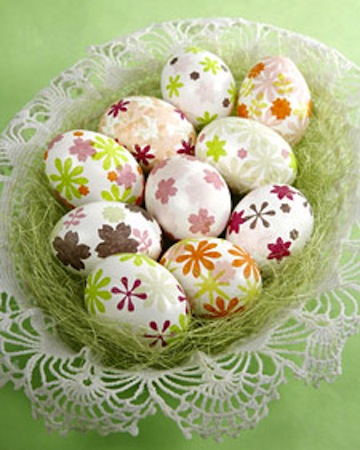
Tissue Paper Eggs
Tissue paper is for more than just wrapping presents. How about decorating eggs?
Materials:
Tissue paper
Crafter’s punch
Tweezers
Decoupage gel
Paintbrush
How-To:
- Fold the tissue paper four times.
- Punch tissue paper with crafter’s punch.
- Separate layers with tweezers.
- Paint thin layer of decoupage onto egg.
- Pick up punched-out shape with paintbrush and place it on the egg glossing over it with a thin layer of decoupage.
- Let egg dry.
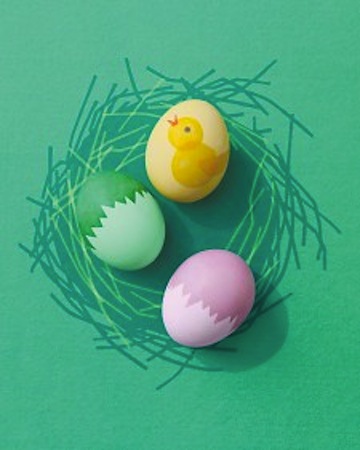
“Cracked” Eggshells and Chick Designs
Pull a belated April Fool’s Day joke by making your guests believe your eggs are cracked with this fun Easter egg trick.
Materials:
Electrical tape
Craft knife
Previously dyed pale eggs with egg dye
Vinyl stencils
How-To:
- Make sure dyed eggs are dry
- For “cracked” eggs: Use a craft knife to cut a random zigzag pattern into a strip of tape and position it around an egg.
- Dip the egg into the same dye up to the electrical tape. Hold egg there until darker color is reached.
- For chick eggs: dab food coloring into vinyl stencils.
- Let eggs dry.
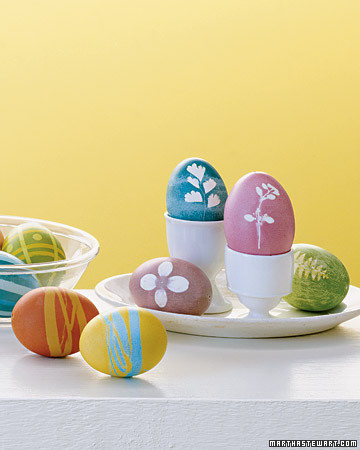
Masked Designs
An easy way to print almost any design you would like on your eggs.
Materials:
White or brown eggs
1/4-inch masking tape
Paper towels
Rubber bands or small stickers
How-To:
- Wrap 1/4-inch masking tape lengthwise around the white, brown, or pale-color (dyed) egg for strips. Rub the tape with your nail to seal it.
- Dye egg with desired color and blot with a paper towel.
- Let dry for 10 minutes.
- Make stripes horizontally around the egg with 1/8-inch masking tape. Rub the tape with your nail to seal it.
- Dye egg in a darker color.
- Let dry and remove tape.
- For other designs, use rubber bands or small stickers that lie flat on the rounded surfaces of an egg.
For more tips visit www.marthastewart.com.